How to spawn Doodads/wmos with Taliis(outdated)
There are soooo many ways to spawn a doodad on a adt.
I picked taliis to do this. Why?
Taliis is a very effective and powerfull tool to work with adts.
After we finished the terrain ,all that is left for our nearly finished area is to spawn trees,bushes,houses and everything else what is needed for our area.
First of we need to make a list of the models what we need.
We need for:
the forest[/color]
-trees
-bushes
-dead trees
-generic stuff
the dock[/color](at the cliffs because the ships have to land somewhere)
-a little house
-fences
-torches
-generic human stuff
The castle[/color]
-a big castle or stuff we need for a castle
-random generic human stuff
-fences
-houses?
-a wall
the path to the castle[/color]
-lights
-fences
In order to find those models and their path ,we open the worldofwarcraft
ModelviewerThen we search for the models which we want to add and write down the path of them.
An eample for a path would be:
worldexpansion02doodadshowlingfjordhfjord_tree_01.m2
Well the model itself has the fileending of .m2 BUT nearlyeverywhere in the Wow Files like the DBC or adt Files those models are named with the Fileending .mdx instead of .m2.
Why? the MDX format is an intern used fileformat..so we will need to use that in our adts too.
So just take that path and the modelname and replace the fileending .m2 with .mdx
worldexpansion02doodadshowlingfjordhfjord_tree_01.mdx
========= Part 1/2 finishedOpen up the ADT where you want to spawn your Doodad/Object.(File->Open)
Switch in the Naviagtion to DoodadFiles
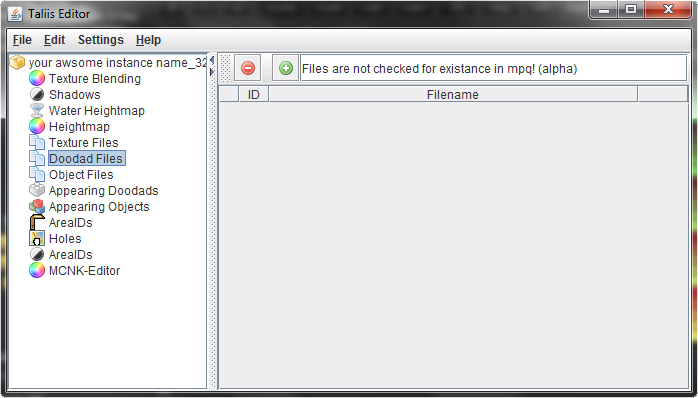
On the Right upper side enter the path into the white Commandfiield next to the red minus and the green plus buttons.

Now press the green plus button.
A new line will appear.
This step is just to tell wow which doodad CAN be spawned.
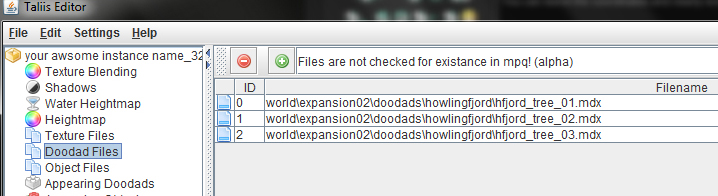
The First row of this line is the ID of the doodad... keep that number in mind.
If you want to spawn another doodad just enter the new path in the command field and use again the green button.
WARNING: Never try to add the same doodad path again. The number of the spawned doodads will be set in the next step.
---
Switch to Appearing doodads.
There also just press the green plus.
A new line will appear.
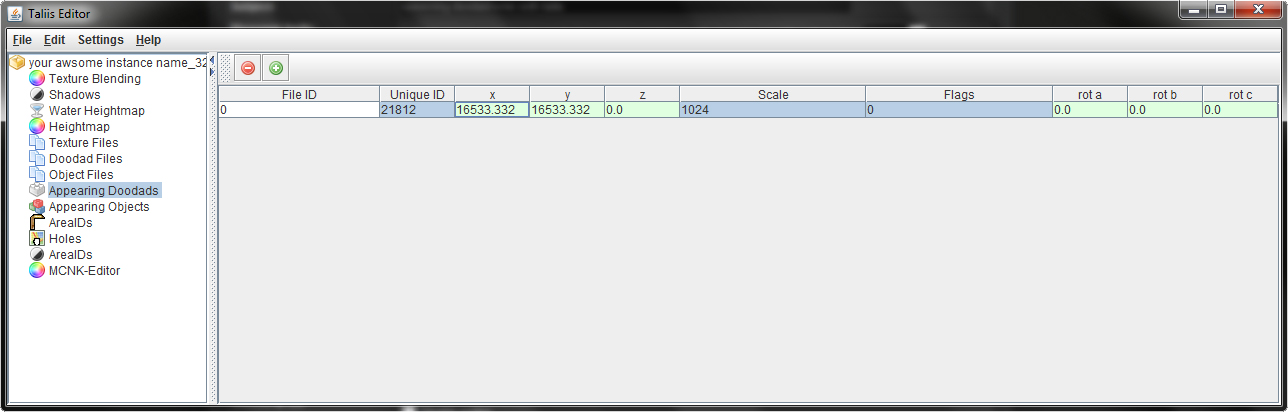
First i will explain you what every row means:
~~~~~~~~~~~~
#File ID = This is the id of the path you entered in DoodadFiles. Switch that number to switch the object to be spawned
#UniqueID = This is a unique number that shouldn't be used twice in the range of the boarding adts. Neither for doodads nor for wmos.
#x = This row is the x-coordinate of the spawned doodad.
#y = This row is the y-coordinate of the spawned doodad.
#z = This row is the x-coordinate of the spawned doodad.
#Scale = this is the scale the doodad has. 1024 is the Normal size which means that it has its actual size.
#Flags = Those are the flags for the doodads.
#rota = This is the rotation around the x-axis
#rotb = This is the rotation around the z-axis
#rotc = This is the rotation around the y-axis
~~~~~~~~~~~~
Now the good thing in taliis is: we don't have to change very much.
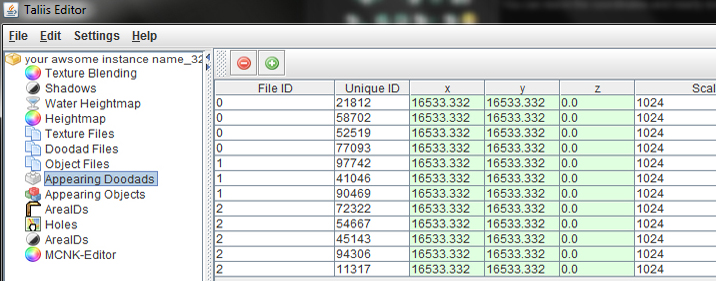
So if i want to spawn the tree not only once, no i want to spawn it twice or three ,four or fifty times.
For that we just have to create a new line. And every time we press the green button a new tree will appear.
You can leave the coordinates and nearly everything just as it is.
If you now want a diffrent sort of trees repeat the whole thing. Add the path to DoodadFiles remember the Id and switch to Appearing doodads. Now As we press the plus the new line automaticly has the default values and it still is the first object as the First row reads the id 0.
Now because the ID of the new tree has the ID 1 we will need to change the first row #File ID to 1.
 ========= Part 2/2 finished
WMOS
Well you just learned how to spawn Doodads.
But what about spawning Wmos?
This is in taliis nearly the same as with doodads.
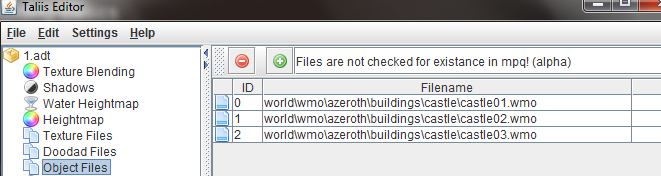
First you will also have to look up the path and the name of the wmo.Then ,in taliis, go to Object Files and enter in the white command field the path and press the green plus.
Switch to Appearing Objects and again,press the green plus.
Here again you can leave nealy everything as it is. Exept if you want to spawn diffrent WMOs, then you will have to change the FileId just like with the doodads ,to the ID of the to-be-spawned object in Object Files.

~~~~~~~~~~~~
#File ID = This is the id of the path you entered in ObjectFiles. Switch that number to switch the object to be spawned
#UniqueID = This is a unique number that shouldn't be used twice in the range of the boarding adts. Neither for doodads nor for wmos.
#x = This row is the x-coordinate of the spawned wmo.
#y = This row is the y-coordinate of the spawned wmo.
#z = This row is the x-coordinate of the spawned wmo.
#Flags = Those are the flags for the wmos.
#rota = This is the rotation around the x-axis
#rotb = This is the rotation around the z-axis
#rotc = This is the rotation around the y-axis
#DD Set = This is the Id of the doodadset,use modelviewer to find out the Id of the DDSet you want to have(0-9)
#Name Set = This is the DBC id of
WMOAreaTable.dbc. Use the DBC id to set the name of the wmo showing ingame
~~~~~~~~~~~~