First of:
Recently a new tool was made public by cromon which does aaaaaaaaaaalll that stuff wich is explained in this tutorial ._. you can see cromons post here:
Click click!A reason not to use it is that you will get a basic understanding here how everything works, and the knowledge presented here may help you in further occasions to work with wow files.
New instance and a new continent
For making a new instance and a new continent you'll need to make a new .wdt ,new adts and some dbc edting.
First of the List of tools which you will need:
-
Taliis-
a mpq editor of your choice(Example: Ladiks MPQ editor)-
adt adder(click on the names to get to the download page)
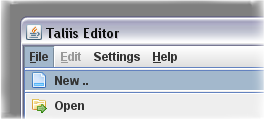
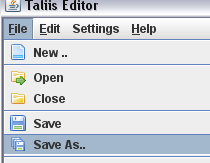
We first start with the creation of the wdt file.
Open up taliis and go on File->new
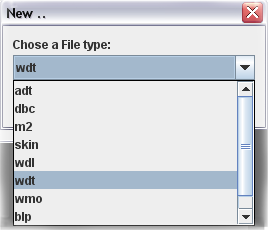
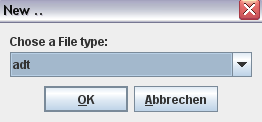
A window pops up and asks you which file you want to create. We choose wdt.
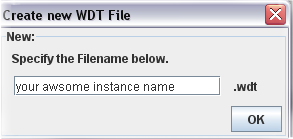
As we appoved that, another window pops up,where taliis wants us to enter the name of the new instance. Think of something awsome and how you maybe want to anme your project and type that in.
Now after we confirmed the name , taliis jumps back to the normal view but see! it opened our new wdt.
Click now in the navigation on "ADT Array".
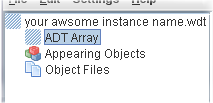
As you will see, the adt array opens up and shows us as foreseen the adt array

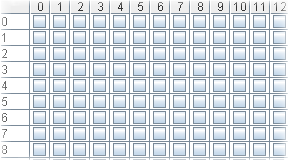
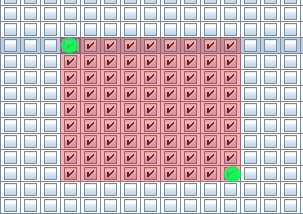
You can try out to click some where on that pattern. A little tick

will appear.
Every tick in that pattern symbolizes a single adt. Now try to imagine how many adt you will need for your project and add about 30% to have enough space for your work.
Now search a place ,like something in the middle of the adt array and make as many ticks as many adts you want to have. Try to make sth like a square ,then its not gonna be that difficult to create the new adts.
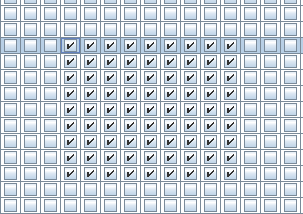
I checked way too much but thats okay. Then i have enough space to work on.
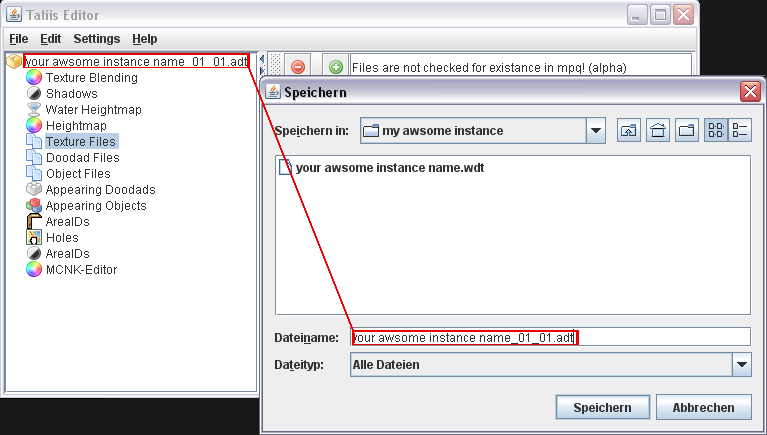
For now ,we can save our wdt file.
In the saving window just enter the same name you gave taliis and add the filetype ending .wdt to that name.

Press "save" to save your wdt file.
Dont close taliis yet!
========= Part 1/3 finishedNow we need
one new adt.
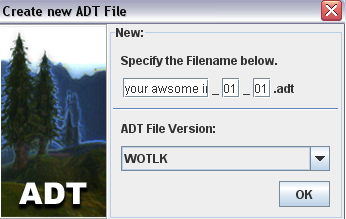
Again we go to File ->new.
But this time we choose adt^^.
In the upcoming window taliis asks us how we want to name our adt.
Simply enter the same name as the one of the wdt. You can leave the adt coordinates as they are, because we dont need them right now.
In the lower section of this window,theres a drop down menue where you can choose your client version. Right now every adt version works in every client version BUT choose the adt version of your actual client just to be sure,that everything works fine with noggit and your wow client.
As we confirmed our settings,taliis jumps back to normal view and shows us our adt.
In the navigation, we now need to go to Texture files.
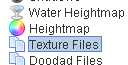
Why that?
The adt we created has no texture files ,which means that you have no texture for your ground. And as noggit (just like any other 3d program) can't render something that isn't there, it will crash(just like wow^^). So we need to set a gorund texture so that we can work with our adt.
For now just copy following path:
tilesetelwynnelwynngrassbase.blpAnd paste it in the white command field.

When you press the Green plus beside the command field, the texture is added to the adt file.
(the display of that is atm a little bit buggy...just reload the texture files by clicking in the navigation on another work field e.g. Heightmap and then switch back to Texture Files,the new rows should now be there!)

The adt is now finished and we can save it.
Again just like with the wdt,enter the same name and set the filetype ending behind it(.adt)
Now to the mass adt creation,because right now we just got only one adt, but will need many more.
Open up adt adder.exe
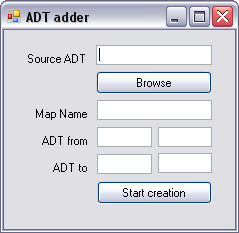
Now you browse your adt you just created with taliis.
Enter in Map Name your MAP name.

Below that, you are asked to give the upper left adt and the lower right adt.
Why and how?
This pic should explain nearly everything:
With those two coordinates , a simple quadratic form can be made. And this program creates a quadratic form of adts with those coordinates. So just go back to taliis where your wdt file should still be there and search for your coordinates.
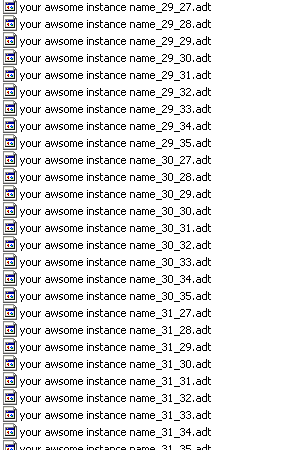
As you know an adt file name is build up like this:
mapname_xcoords_ycoords.adt
In taliis you can read out the coordinates simply like that:

So Now just do that with your quadrate

So now i know that my adt name is:
Left upper corner "my awsome instance name_29_27.adt"
Right lower corner "my awsome instance name_37_35.adt"
Back to Adt adder.
Now that we know our adt names and their coordinates, we just enter the coordinates into the fields.
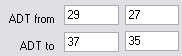
ADT from: xcoords ycoords (left upper corner)
ADT to: xcoords ycoords (right lower corner)
After that, we start the creation and wait some secs until its done.
Now there should be all the created adts in your ADTadder folder.
Now like that they won't show up in Noggit or InGame.
You need to fixx them a little bit...for taht ,just copy the offsetfixx.exe and the cygwin1.dll into the folder where the adts are located. Now create a new Textdocument where you paste this in:
@echo off
for %%i in (*.adt) do OffsetFix.exe "%%i"
pause
After saving that, dele the fileending .txt and replace it with .bat

and then just use it^^
The fixing is done.
========= Part 2/3 finishedNow to the dbc part.
We open up your favourite MPQ editor, and open up
locale.MPQ and extract the Map.dbc from the DBFilesClient folder.
NOTE: To asure that it will work, use the newest map.dbc. You can find that one in the patch-enUS-x.MPQ. Choose again the mpq with the highest value for x.Just use the locale.MPQ if there are no patch-enUS-x.MPQ files.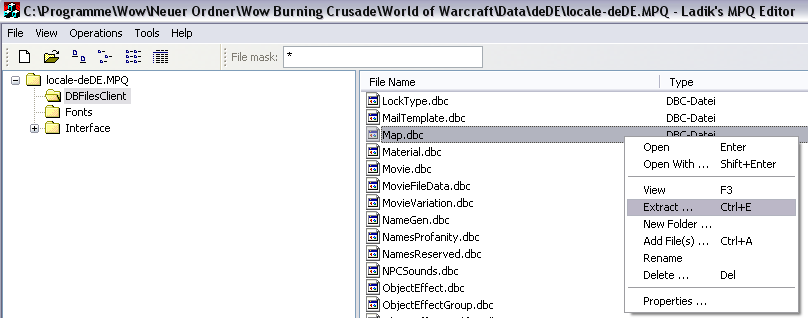
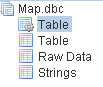
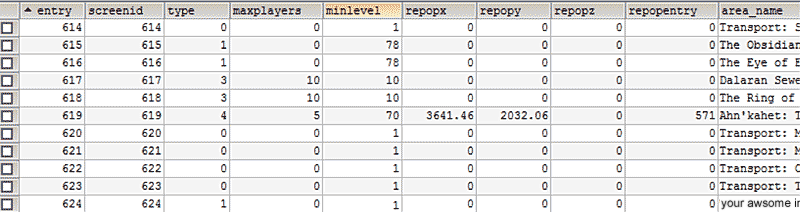
Open that dbc with taliis and switch to the first table menu in the navigation.
Now select any row,right click and copy it.
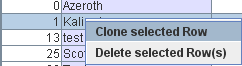
Now scroll down and see: The new row is there but still with the values of the original row.

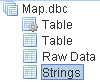
We will need to change that but first,switch to "strings" in the navigation.
Now enter in the white command prompt your map name,and press the green plus on the left side of it.
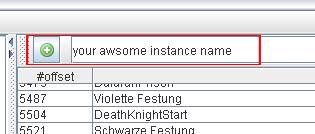
Now scroll all the way down again. There should be a new entry with the name of your map.
On the left side of this name , there is a number which you should keep in mind.

Switch back to the first table menu.
Scroll again down to your entry you made before.
Now look at all the values which are in you row.You should be able to cognize which number in which column approximately stands for sth.
You can do that by looking at the other rows.
Well but here for those who don't know what to change:
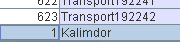
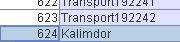
Column #0 is the id of your map. As we copied a exsisting row, it still has its number. In my example its 1 which is from Kalimdor.
I now look to the upper row and look which number it has,and add 1 to it.

Now in column #1 there is the name of the old map. We now click on it, now the name disappears and it shows us a number. This is the string offset... you now need to remember or look up your added string id and enter it there.

Switch to column #7 and replace the number there with your sting id of your map.
Now there should be your map name in those two columns.

Leave the rest as it was. If you want more to know about this dbc and which column means what visit
this site.Now save the dbc and close taliis.
For your Server
If you want to be able to teleport on your server on this map, you will need to add an entry on you database of your sever.
Take your favourite MySQL tool ,connect to your server and open the Worldmap_info(Aspire).
Again as in the dbc,duplicate any row and change the values of the duplicated row.
The first two numberes are again your map ID which are the same number as the id in the map.dbc.
In the Area_Name column you change the name of the old map name into your new map name.
OR when you don't have aspire, just browse the dbc folder of your server and replace the Map.dbc with the one you just edited for your client. The structure and the content are the same for those dbcs.
And then : restart your server.
If you use Trinity you have to add a row in the MapDifficulty.dbc add this to your server and the client patch.
For the Client
Pack your new DBC,wdt and adts into a patch and now you should be able to port your self in the new instance.
At this point noggit won't show up your new instance because you will have to put the Files also in the wow folder and not in the patch beacuse noggit sets the priority of the dbc files to those who are extraced into your wow folder.
Now just take the adts and the wdt files and put them in to the wow folder like this:
For adts and wdt files:
wowfolderworldmapsyour awsome instance name
(Be sure that the folder of your adts has the EXACT name as you entered it into the dbc)
And move the .dbc files into this folder:
wowfolderDBFilesclient
Well just the same folder sturcture as in the mpq file

If you still have problems with packing the files into a patch, look at jacks tutorial, where he explains the basics of MPQ files. Link:
viewtopic.php?f=26&t=41Forget MPQs: don't pack anymore(advanced)
A better way to do all this is to just use local files and only pack a MPQ if you want to distribute the files for your server or for other people. This way you don't have to do much with your files after you are done with noggit.
Basicly just follow this here:
viewtopic.php?f=26&t=1828And your wow Client should be able to load the files without using a MPQ file.
Traveling to your Map
Now if you want to find out the coordinates for your new instance,just open noggit and select your map.
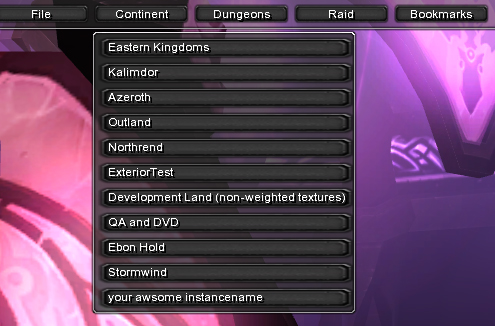
Now follow this tutorial:
viewtopic.php?f=22&t=255&p=1258#p1263or just press 'G' on your Keyboard to get the coordinates extracted into the ports.txt file, which is located in the noggit folder. Therein you should then find the teleport commands for your location for Trinity and ArcEmu!
Now teleport your self ingame to your new instance!
FAQ:
Q: "My ground looks greyish and not how it should be ,in noggit."
A: Just save the adt one time and reload it with noggit.
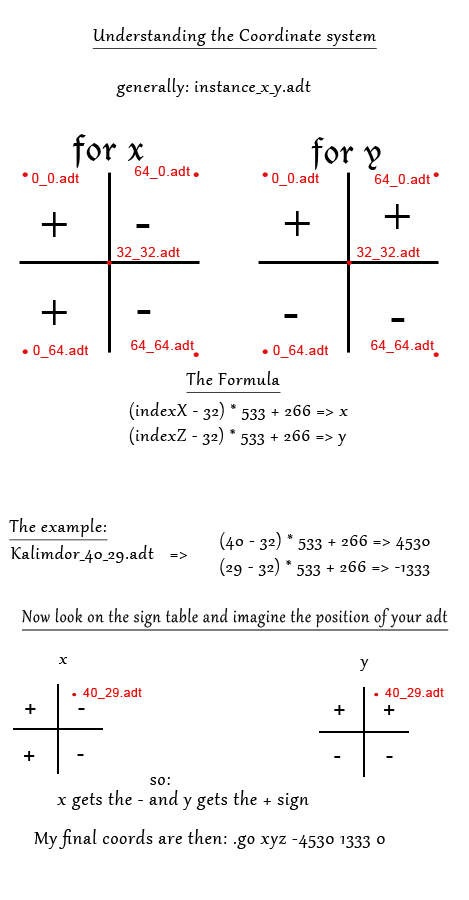
Q: "How do i get the coods without noggit?"
A: Hum take a look at this:
[spoiler:22lx35a8]
[/spoiler:22lx35a8]