This guide has been written for WoW 6.0.3.
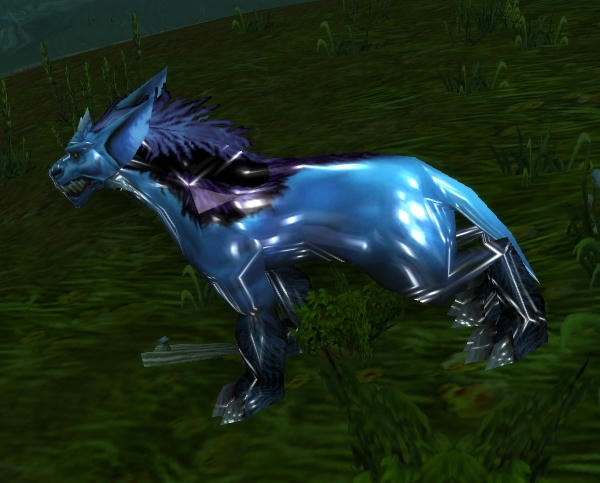
This is the effect:
Here is how I've proceeded:
To apply the reflect effect, I've studied the Murloc files.
There is no need to touch the renderFlags, because we will use a shader effect.
You will need:
- the .blp file used for the effect:
http://www.mediafire.com/download/lxox9 ... eflect.blp- M2Modder:
http://www.mediafire.com/download/9d0p381lgi1wcfi/M2Modder2.rar- 010 Editor:
http://www.sweetscape.com/download/010editor/- 010 Editor templates:
http://www.mediafire.com/download/o3aajs1kzt9e493/010Templates.7z- WoW Model Viewer 0.7.0.6:
https://wowmodelviewer.atlassian.net/wiki/display/WMV/Download+WoW+Model+Viewer- Ant Renamer:
http://www.antp.be/software/renamer/download- a .mpq version of WoW files: You can find them stored online, for instance on a FTP.
Go here and search "texture.MPQ":
http://www.ftpsearch.co/For instance:
http://ftp://85.225.206.55/Public/World%20of%20Warcraft/Data/The needed files are: alternate.MPQ, itemtexture.MPQ, misc.MPQ, model.MPQ, texture.MPQ, wow-update-base-*.MPQ, /EnGB/*.MPQ, except the speech files.
You need to use old version 0.7.0.6 of WoW Model Viewer until the new version allows use of local files.
The new version is in alpha, on the date of 14/01/2015.
1. The trick here is to apply the BodyOrClothes texture, then a Reflect texture on top of it.
To do so, I've added the 2 new textures with M2Modder2:
- 1.BodyOrClothes
- 0.Hardcoded, Texname: the path to your relect texture, for instance, CharacterDraeneiFemaleReflect.blp
This .blp must be in black and white. White will be the reflect spots, you can made them grey and smooth them for a less "plastic" effect.
But there is a bug: the TexLookupTable is all messed up.
In 010 Editor, open your backup .m2 to put back the good values and just add the 2 last Texture ids in the 2 last TexLookupTable.
We are done for the .m2.
2. Open 01.skin file with 010 Editor.
We will change values in TextureUnit:
- order (shader_id): 32769 (apply the reflect effect).
- d4 (op_count): 2 (number of textures to load, one over the other).
- textureid: the id of the .m2's TexLookupTable.
I've only changed it in 01.skin, because it is the skin used for character selection and when zoomed in in-game.
3. We have to find which textureUnit is assigned to the body parts Submeshes.
One trick is to modify all the textureUnits with the field renderFlags pointing to the .m2 renderFlags set to 0,0.
This means it is a body part Submesh, most of the time.
4. A most efficient way is to open the .m2 file in WoW Model Viewer.
To do so, the trick is to get an old client version of WoW, with .mpq files, so we can use WoW Model Viewer 0.7.0.6 with all its features!
To load custom .m2 and .skin, you have to put them into "WoWData" folder, or in a custom .mpq file.
5. In WMV, click on the menu Options, Settings and add the custom .mpq in the list or check Use Local Files to use unpacked files.
The last trick is to rename the HD files, so it will be listed instead of the old model files.
An easy way to do this is to use Ant Renamer and remove _HD in all the file names.
By the way, you just need the .m2 ans .skin files, as the textures will not apply correctly.
But we don't need the textures to identify submeshes.
6. Select the model you want to edit and click on the menu View, Show ModelControl.
In this new windows you can view the .skin render by changing the value in the View drop-down list.
1 is 00.skin, 2 is 01.skin, etc.
Personally, I've only changed 01.skin, so I set it on 2.
7. You can check the Wireframe option to better see which submesh appears when you check it in the Geosets list.
Geoset number is the same as the TextureUnit in the .skin file opened in 010 Editor.
Now, you just have to change the values of order, d4 and textureid for each submesh desired.
Notice that the last submeshes will not appear in the Geoset list.
Here, you will have to guess by hand as explained in point 2.
8. That's it! You've added the textures in .m2 file and the shader effects in the 01.skin file.
Now, save the files, launch the patched Wow.exe and cross your fingers. Do not use WoW-64.exe as it will be very unstable.
You can change this in Battle.net Launcher by clicking the blue icon in the upper left corner, Settings, Game settings, and checking Launch 32 bits client.
Feel free to ask for the softwares, but you can find them with Google.
I can add some screenshots if needed.

